


BINGE
Cancel subscription
How to Cancel BINGE Subscription
Cancel BINGE through the company that bills the subscription. BINGE’s official guide separates direct account, Apple, and Telstra or partner cancellation routes. BINGE says a direct paid subscription normally remains available through the end of the current billing period; partner offers can differ. Compare every supported billing route, cancellation effect, refund boundary, and proof to keep.
- 2 official sources checked
- 3 billing routes separated
- Cancellation and refund outcomes kept distinct
Cancel BINGE through the company that bills you
Web · Verify this billing owner
Cancel BINGE on the web
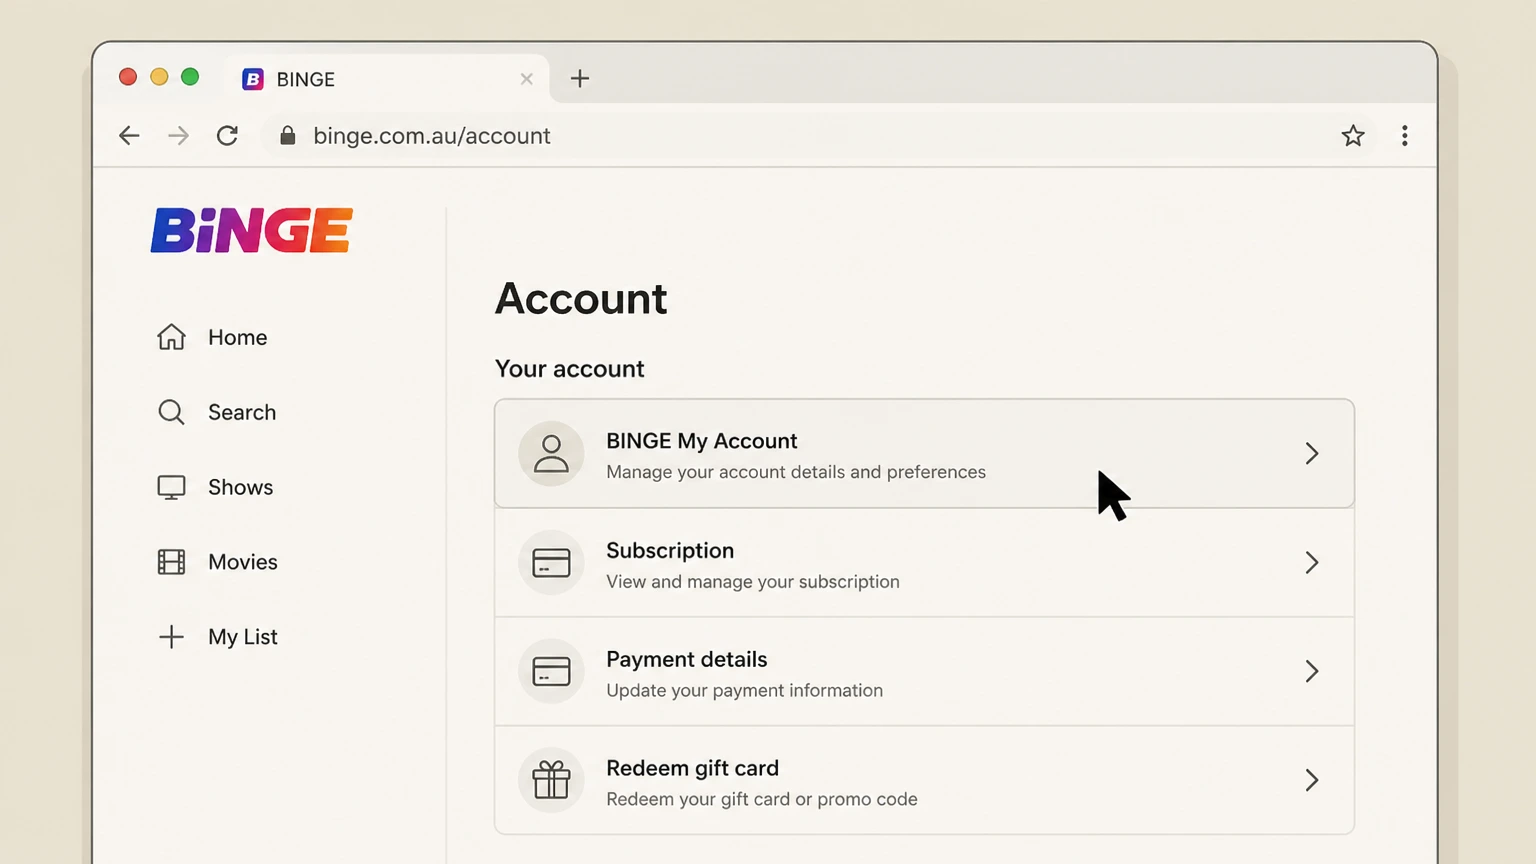 1
1Open BINGE My Account
Sign in with the account that owns the direct subscription.
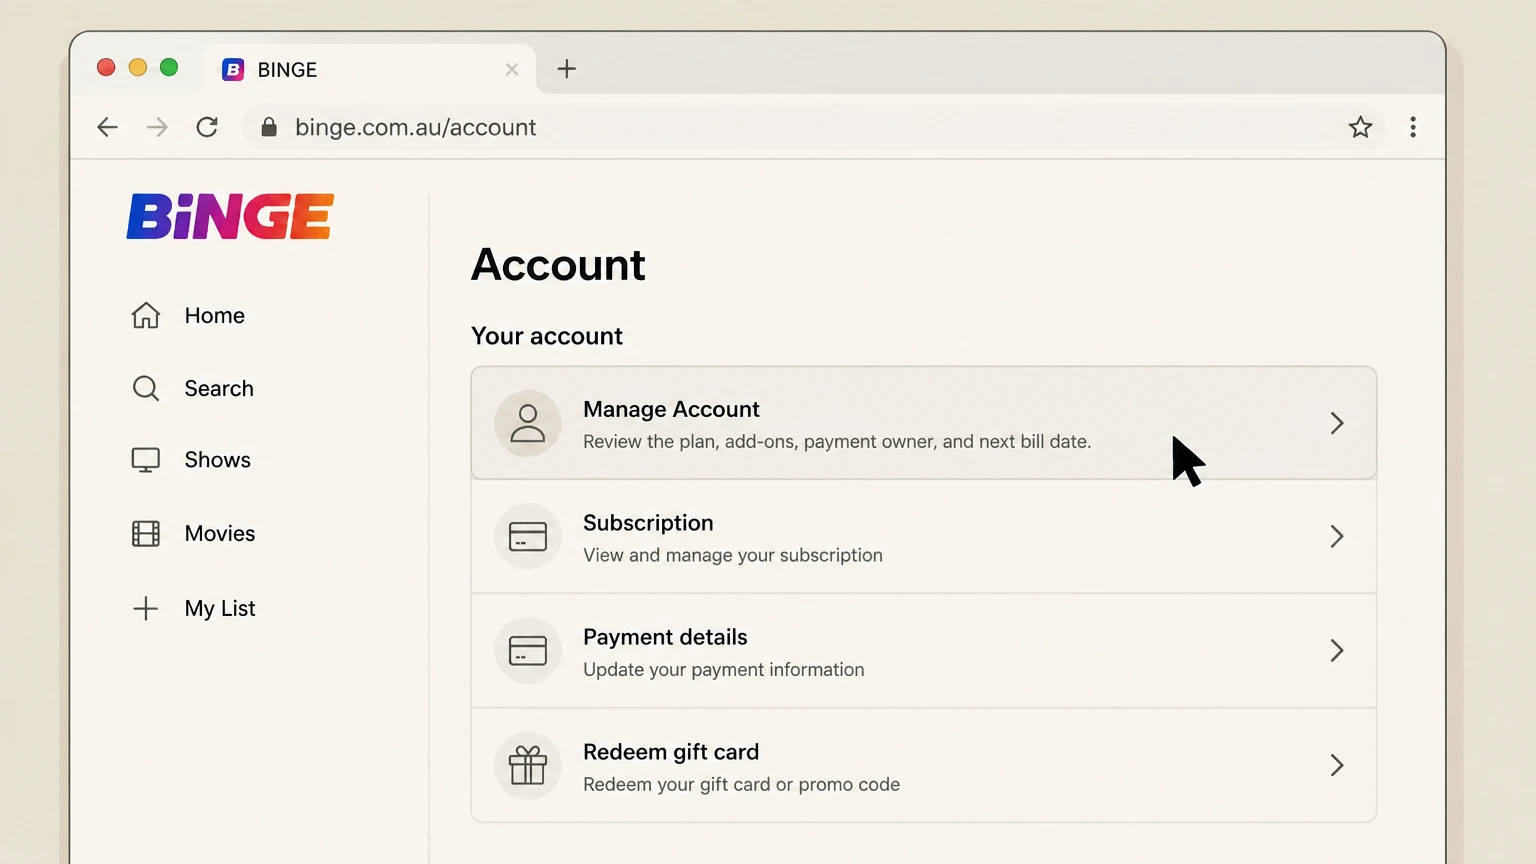 2
2Open Manage Account
Review the plan, add-ons, payment owner, and next bill date.
- Let Pine handle it
Pine can help
Too many steps?
Pine can find the right Web path and handle the cancellation for you.
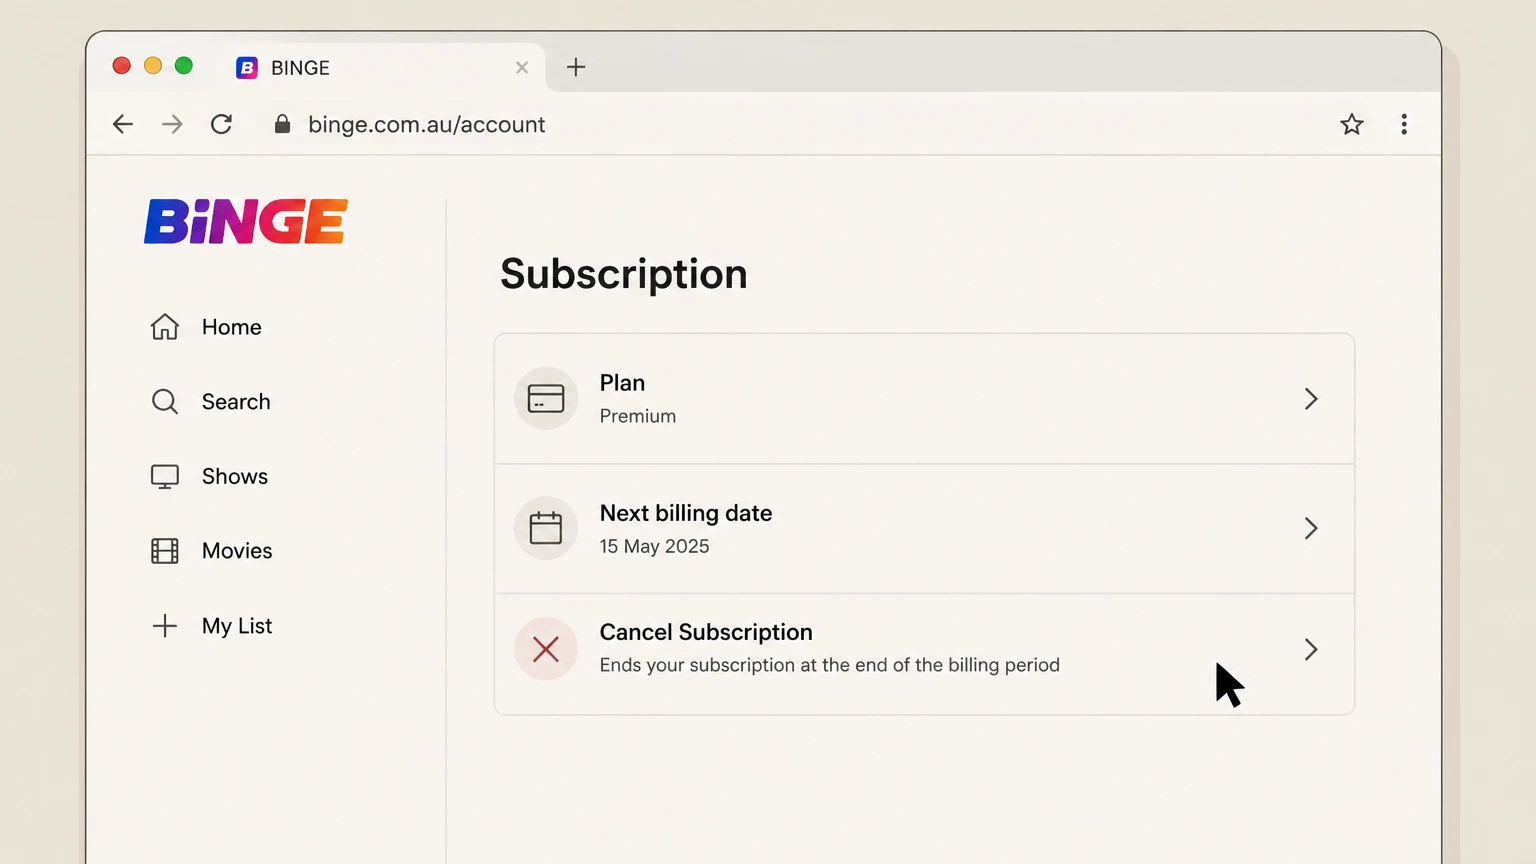 3
3Choose Cancel Subscription
Complete the prompts to the final confirmation.
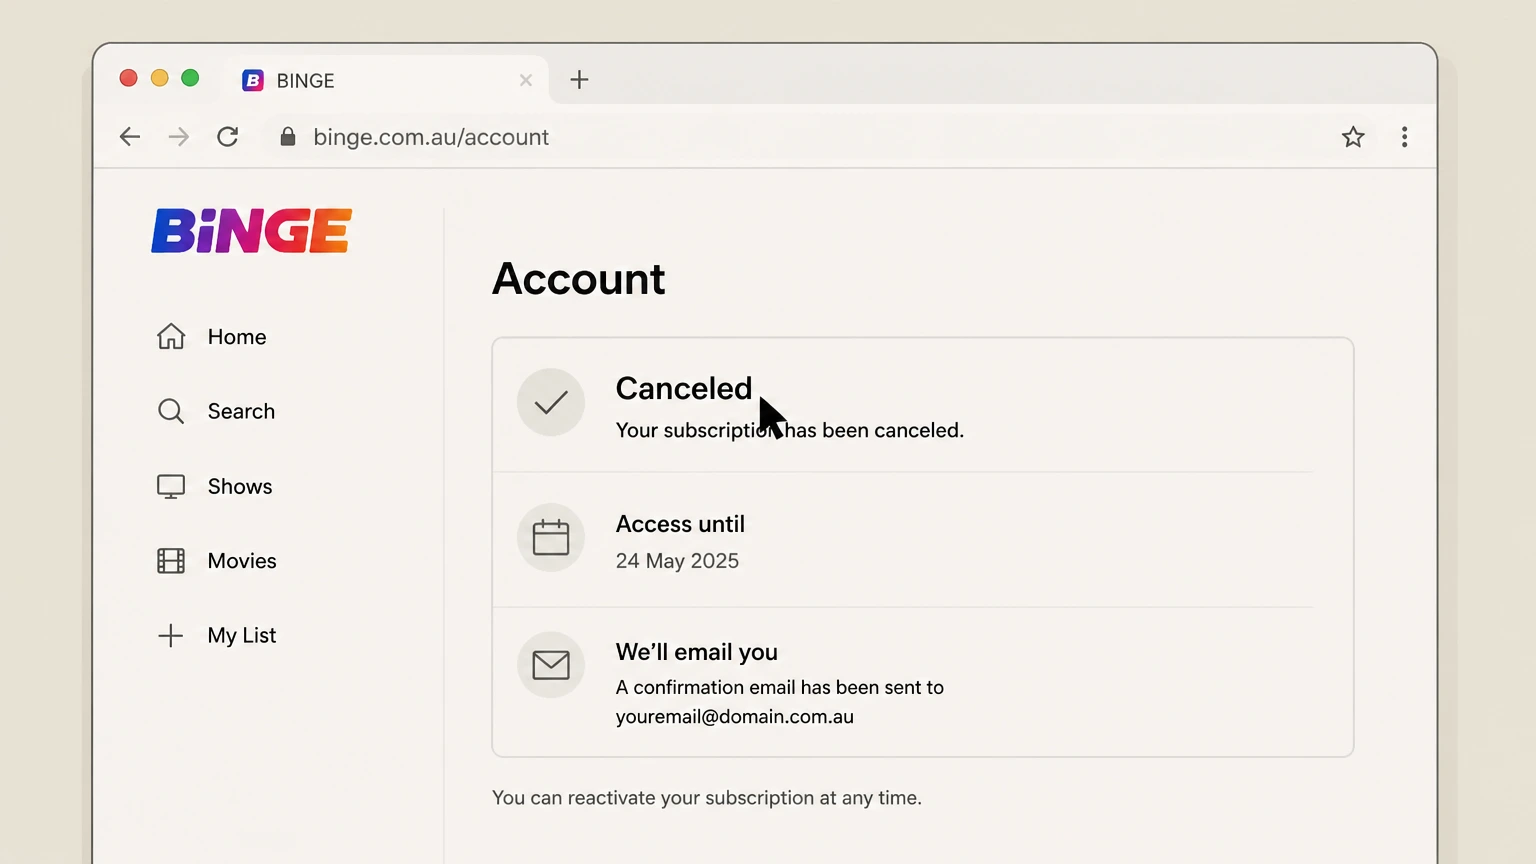 4
4Save the effective date
Keep the account status and email.

iOS · Verify this billing owner
Cancel BINGE through iOS
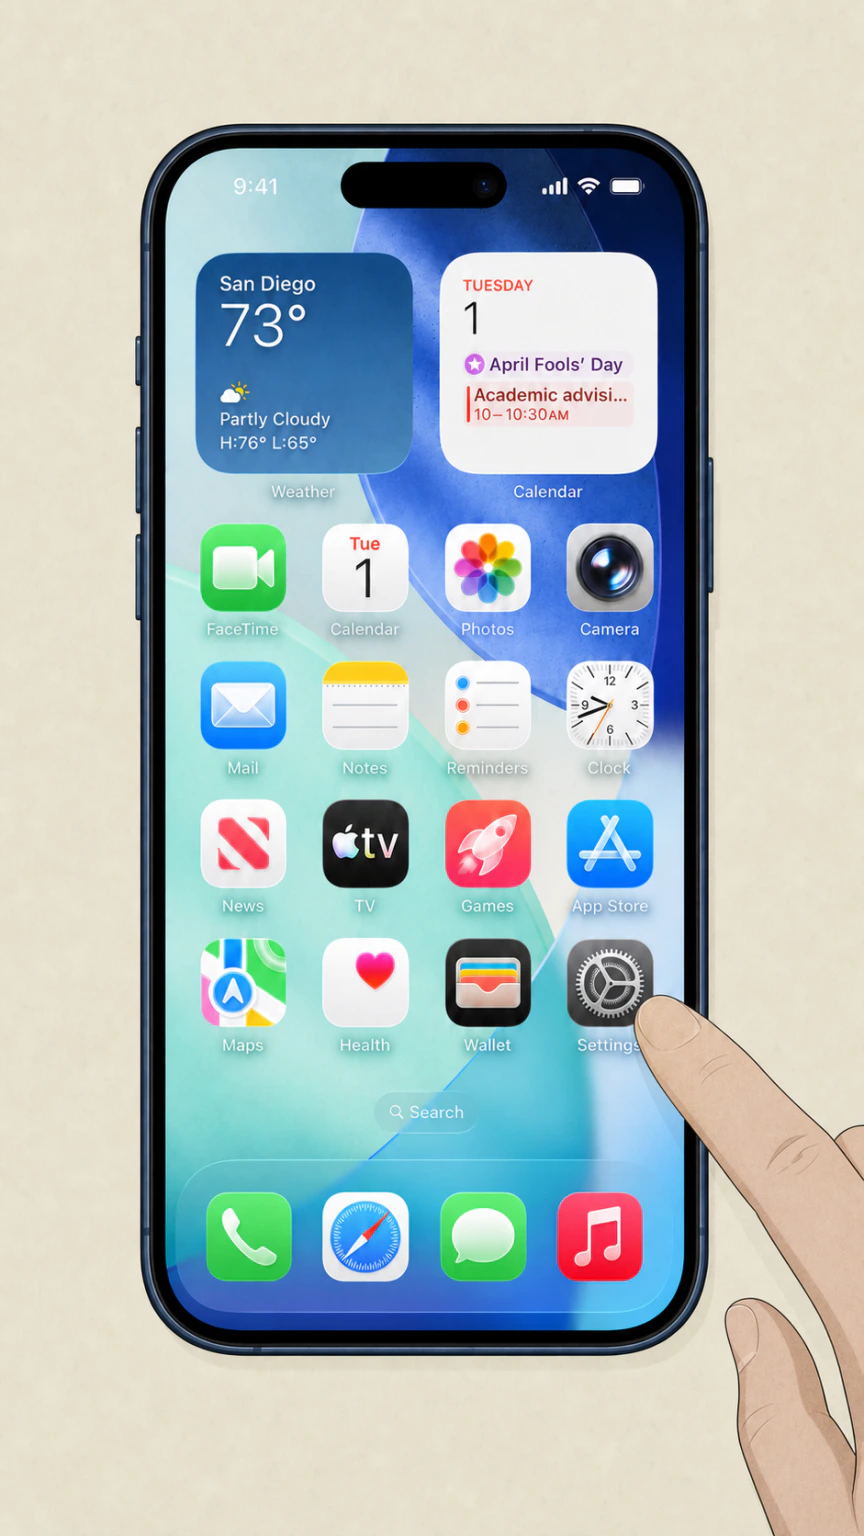 1
1Open Settings
On an iPhone, open Settings while signed in to the Apple Account used for the purchase.
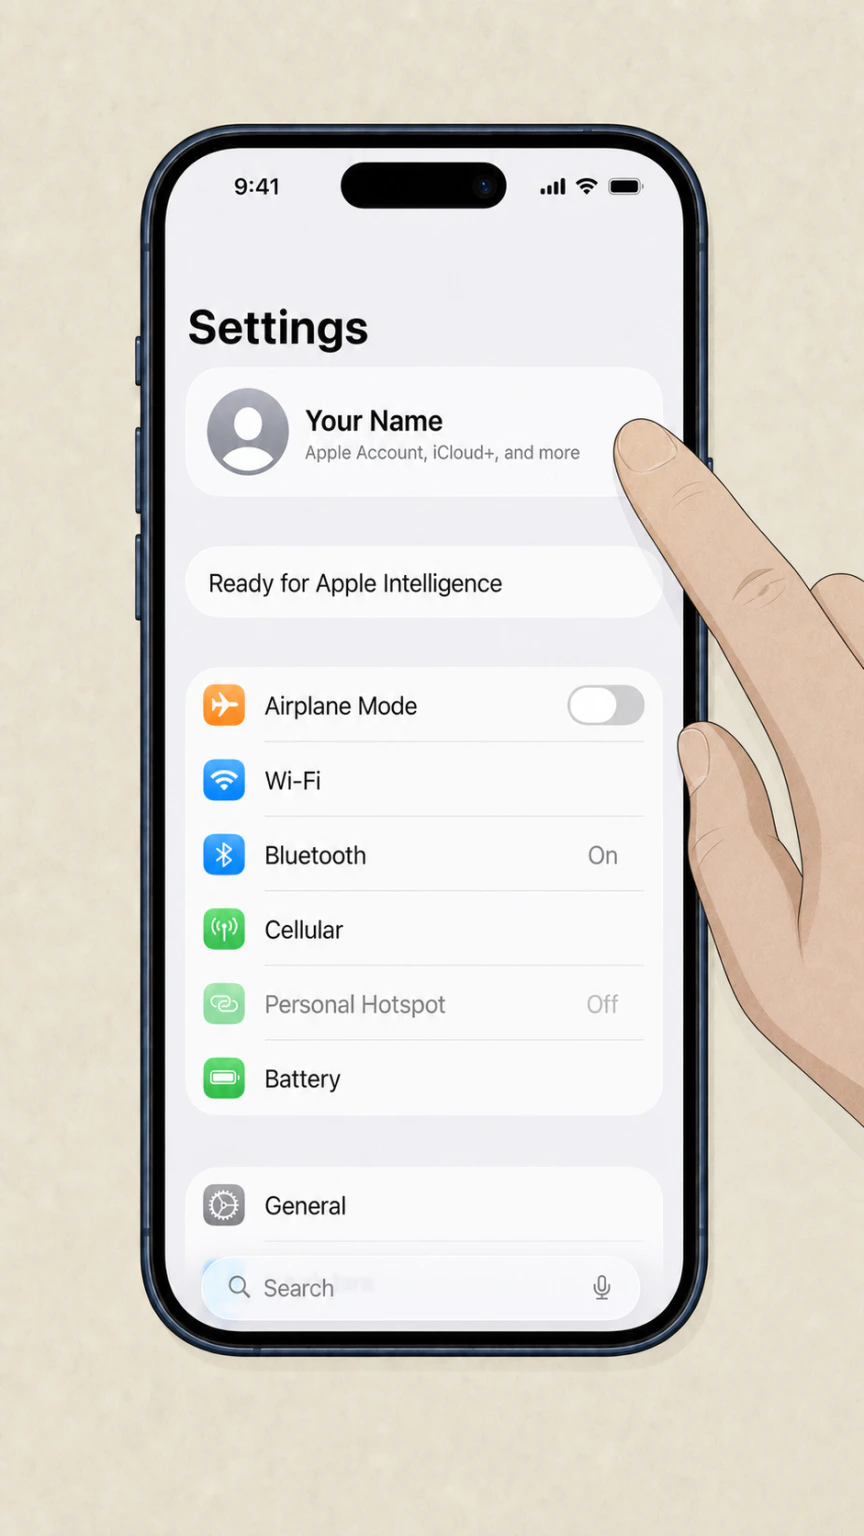 2
2Tap your name
Open the Apple Account card at the top of Settings.
- Let Pine handle it
Pine can help
Too many steps?
Pine can find the right iOS path and handle the cancellation for you.
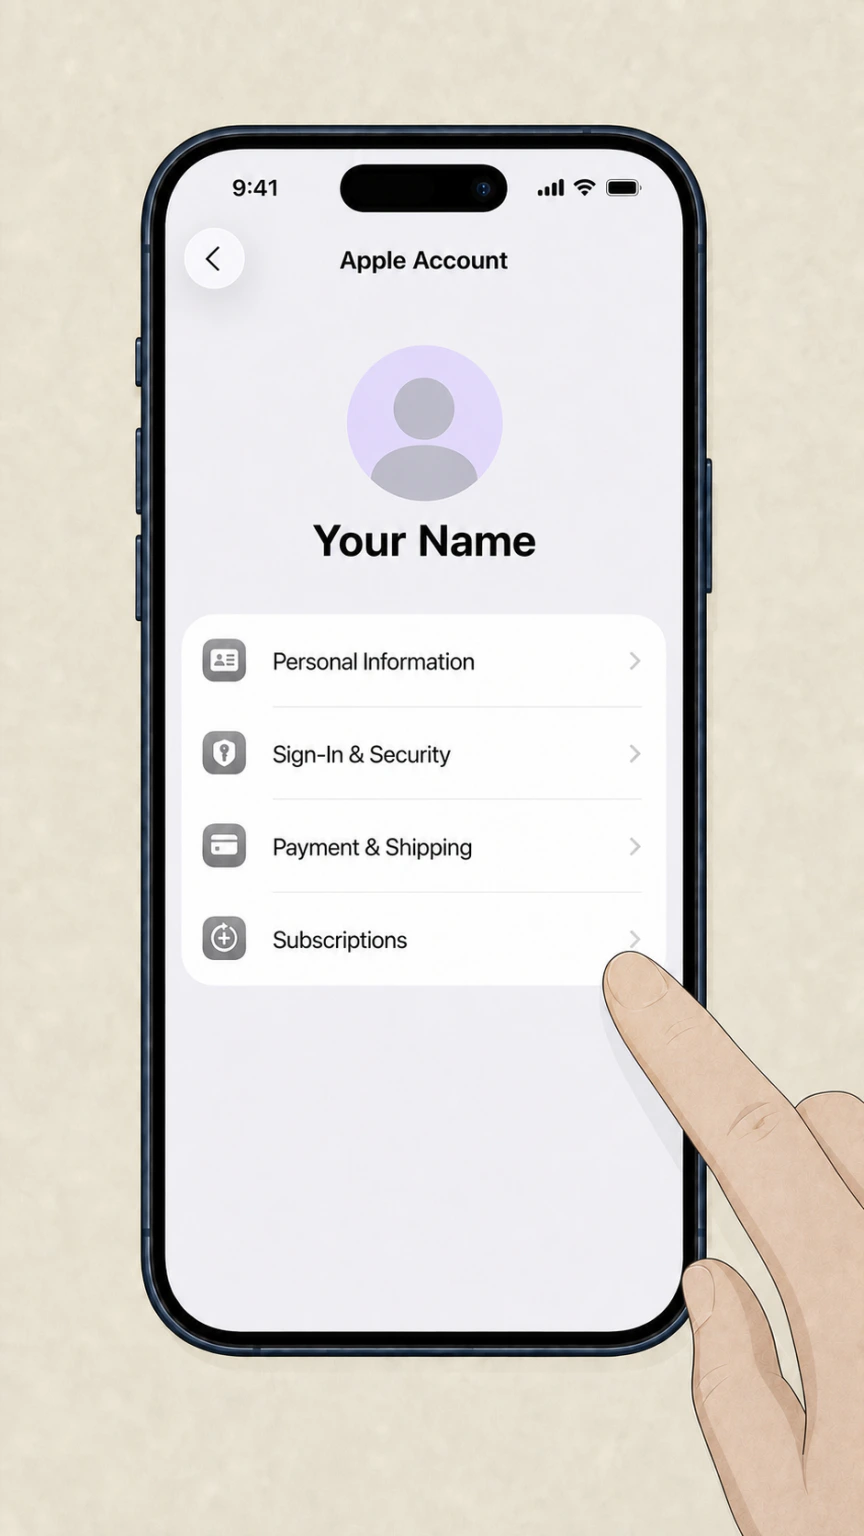 3
3Open Subscriptions
Tap Subscriptions and wait for the active subscription list.
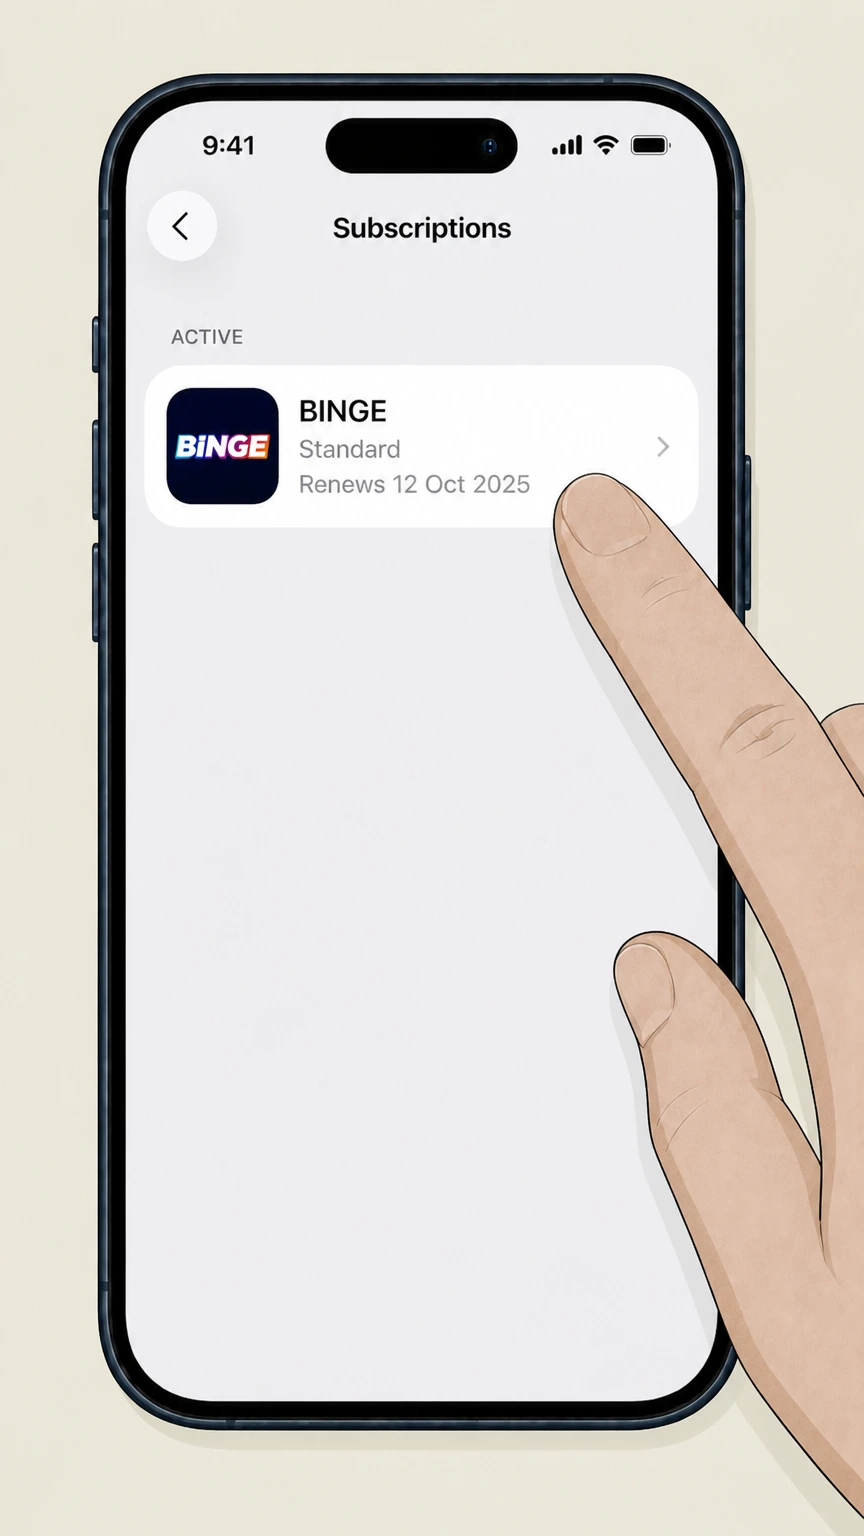 4
4Choose BINGE
Open the BINGE subscription and verify the plan and renewal date.
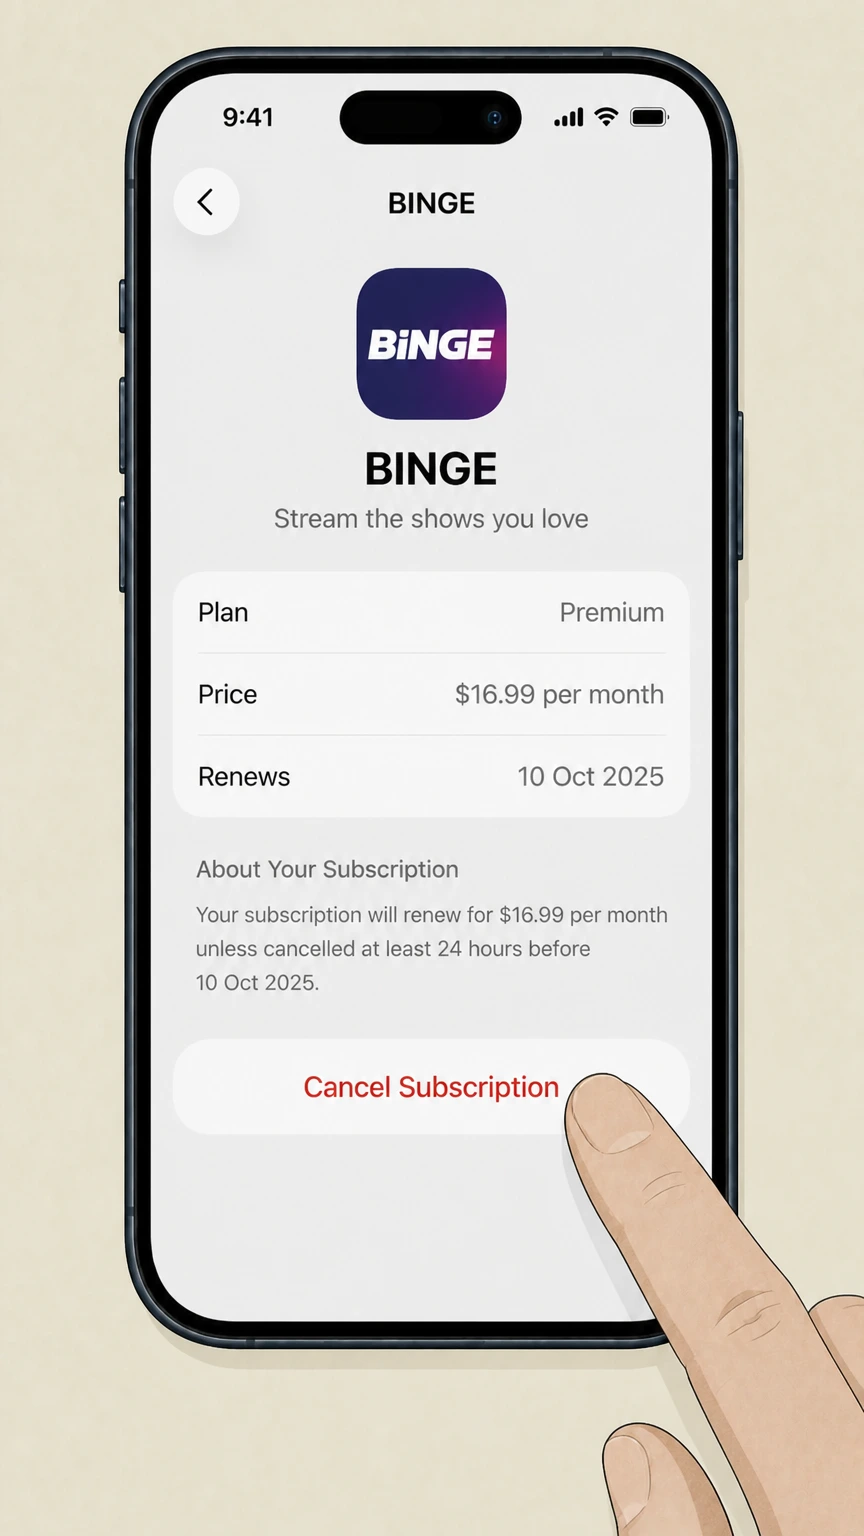 5
5Tap Cancel Subscription
Confirm the change and keep the expiration date shown by Apple.
Billing partner · Verify this billing owner
Cancel BINGE through Billing partner
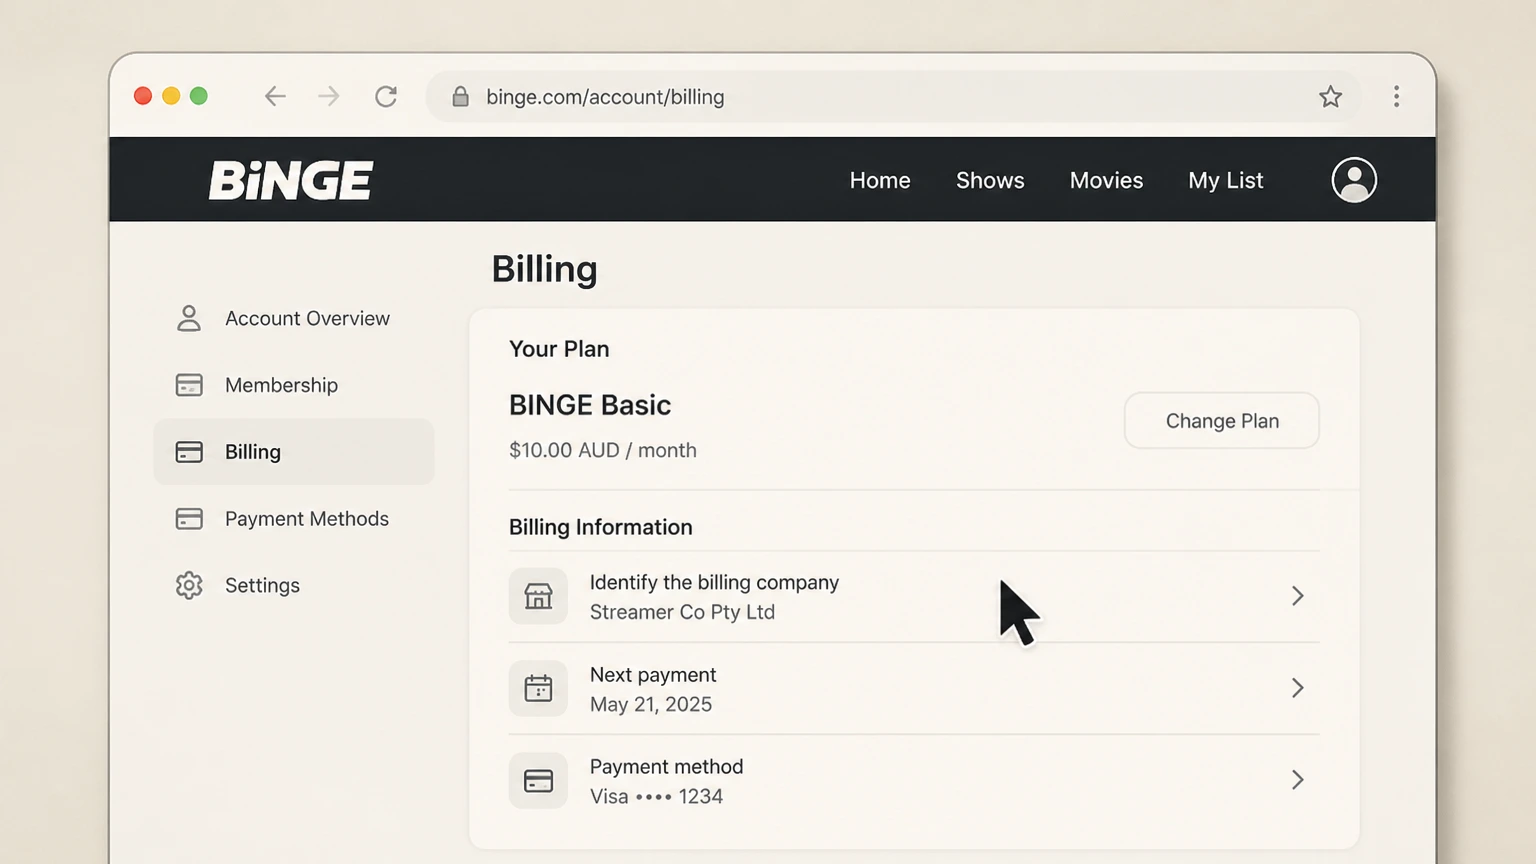 1
1Identify the billing company
Check the BINGE account, receipt, or card statement for the seller name.
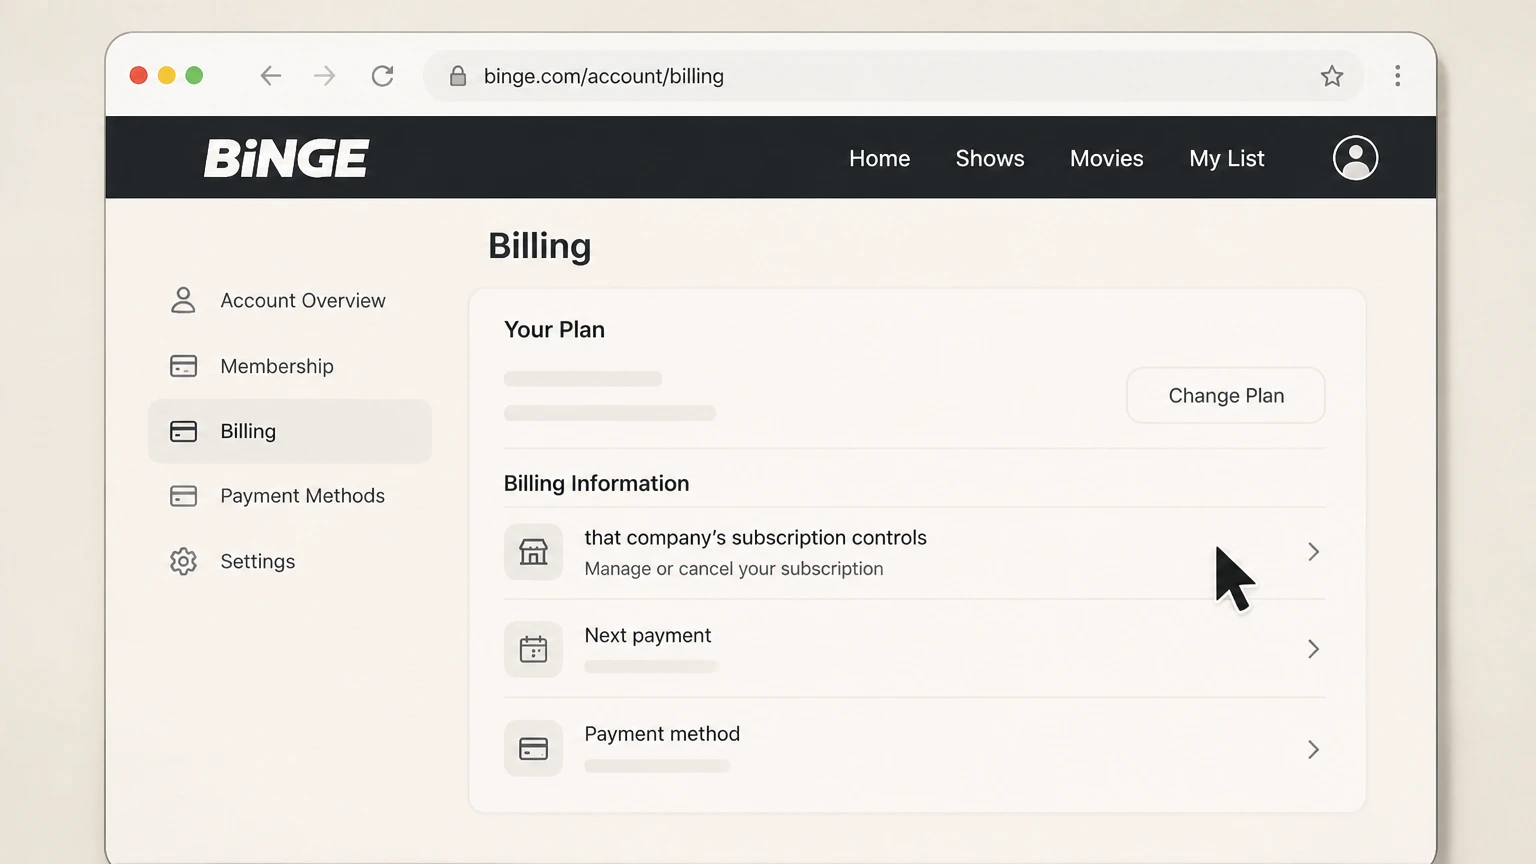 2
2Open that company’s subscription controls
Use the signed-in account connected to the charge.
- Let Pine handle it
Pine can help
Too many steps?
Pine can find the right Billing partner path and handle the cancellation for you.
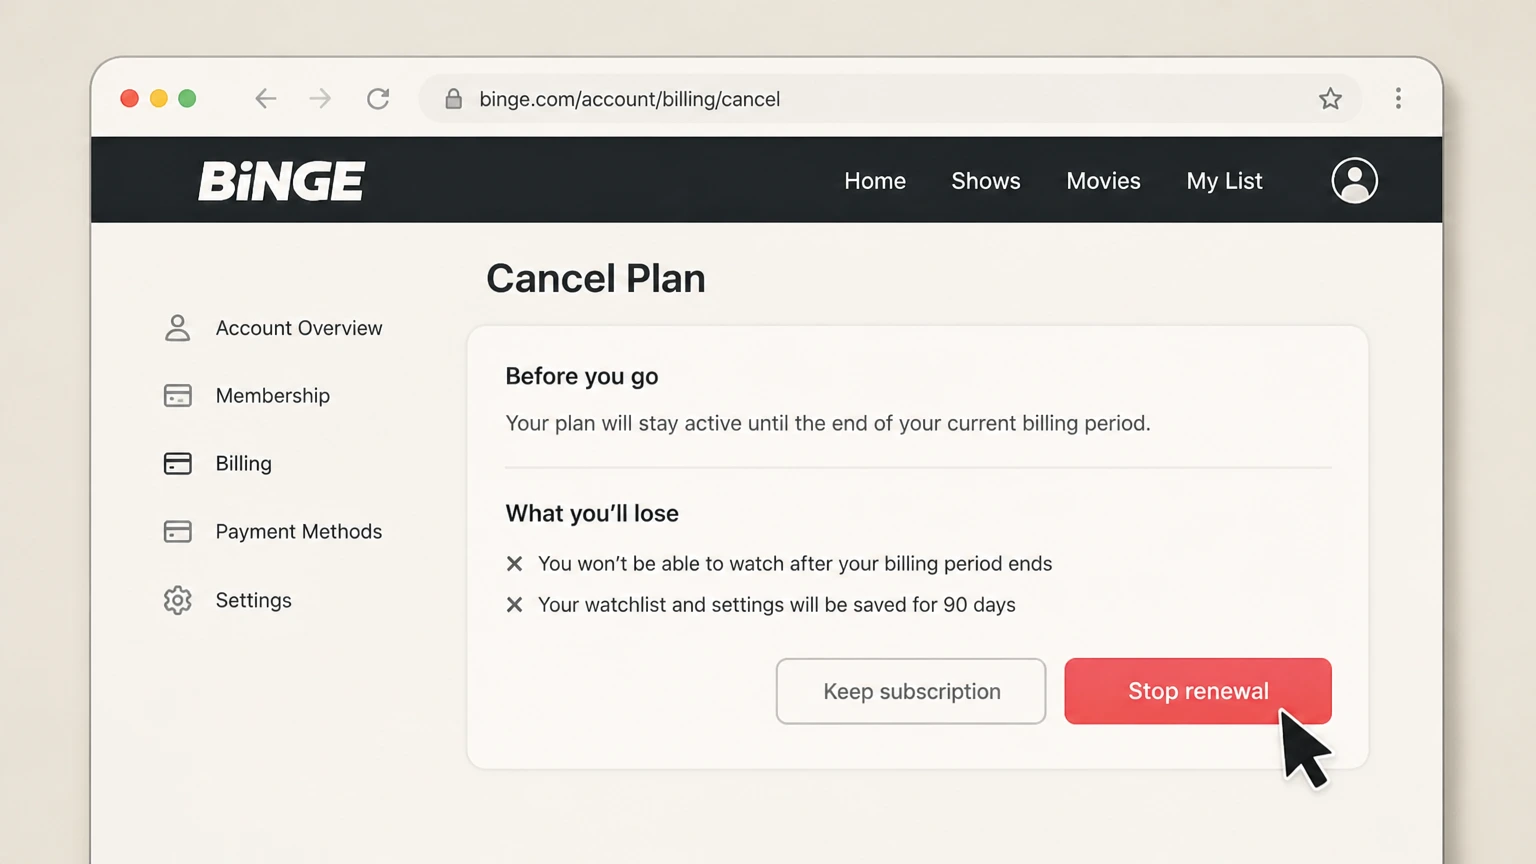 3
3Stop renewal
Follow the seller’s cancellation flow to the final confirmation.
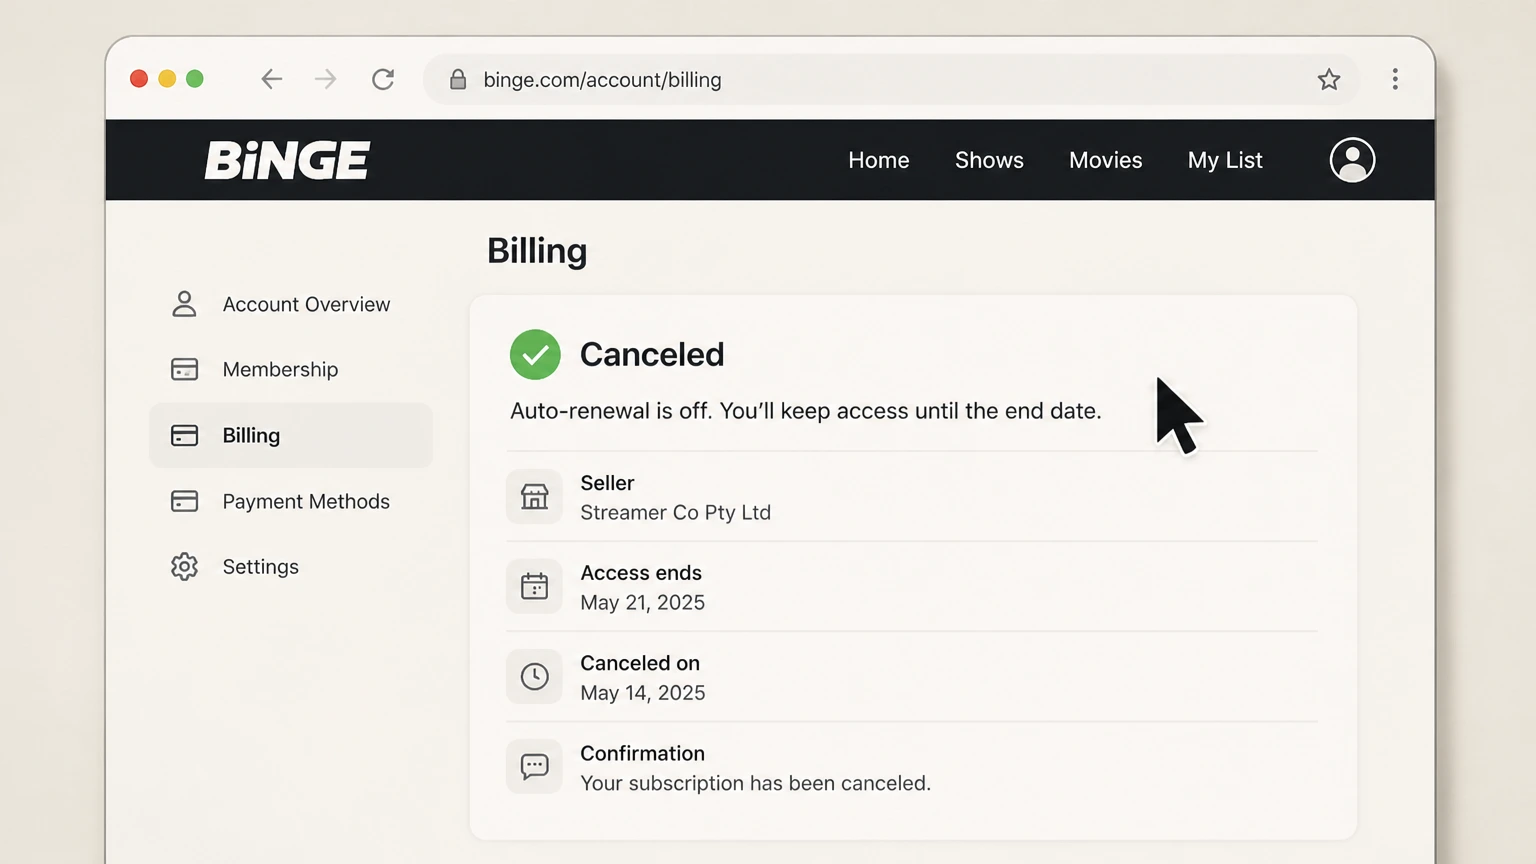 4
4Keep proof
Save the seller name, canceled status, effective date, and confirmation message.
Refund policy
Canceling BINGE does not automatically create a refund
Cancellation does not automatically create a refund. BINGE, Apple, or the partner that collected payment applies its terms and Australian consumer law.
Check my refund options- Renewal
- BINGE says a direct paid subscription normally remains available through the end of the current billing period; partner offers can differ.
- Refund boundary
- Cancellation does not automatically create a refund. BINGE, Apple, or the partner that collected payment applies its terms and Australian consumer law.
Check the signed-in subscription terms and the seller’s refund process before requesting review of a specific charge. BINGE cancellation guide
Choose the right route
Who controls a BINGE cancellation
BINGE’s official guide separates direct account, Apple, and Telstra or partner cancellation routes. Deleting an app, signing out, or removing a viewing profile does not by itself stop a recurring charge.
Telstra offer
Use Telstra subscription controls when the account or receipt identifies Telstra as seller.
Add-ons
Review sports or other extras and whether they renew with the base subscription.
Trial timing
Use the exact next bill date shown and save confirmation before the conversion point.
Keep proof
What to record before and after cancellation
Capture the account and billing details before changing renewal, then retain the final result in case another charge appears.
Before cancellation
Save the plan, seller, amount, renewal date, and account email shown on the receipt or subscription page.
At confirmation
Save the canceled or expiring status, effective date, confirmation number, and email.
After cancellation
Check separately billed add-ons and compare any later charge with the seller shown in the saved receipt.
Troubleshooting
Why the cancellation control may be missing
A missing button usually means the subscription is under a different account, already set to expire, or billed by another company.
Wrong account
Search purchase emails and try the email or store account named on the receipt.
Wrong billing owner
If the provider page names a partner, finish cancellation in that partner account.
Incomplete flow
A retention offer, pause choice, or reason screen is not final confirmation.
BINGE cancellation questions
Answers are tied to the official sources checked on August 4, 2026; signed-in terms and local law still control your account.
How do I cancel BINGE?
Can I cancel BINGE in the app?
What happens after I cancel BINGE?
Will BINGE refund the latest charge?
Why can’t I find a BINGE cancel button?
Does deleting BINGE stop billing?
What proof should I keep after canceling BINGE?
Untangle this BINGE issue.
Let Pine handle the provider follow-up and keep the confirmation in one place.
